
Here’s a little bit about Pic’s Really Good Peanut Butter:
From its origins in Pic Picot’s garage in 2007, Nelson, New Zealand-based Pic’s Really Good Peanut Butter has today become New Zealand’s No. 1 peanut butter and can be found in gourmet and specialty stores and supermarkets in Australia, Singapore, Hong Kong, the U.K. and the USA. Pic’s is shipped to mail order customers all over the world and is used and recommended by New Zealand’s top chefs.
Pic’s imports the finest quality Hi-Oleic peanuts from Kingaroy, Australia, roasts them on the premises and grinds and seals them within minutes of roasting –ensuring maximum freshness and their signature fresh-roasted flavor. Pic’s Peanut Butter contains no ‘additives’ (except salt in the salted versions), only peanuts. Pic’s is truly natural peanut butter, gluten and sugar-free, higher in the good monounsaturated oils and high in antioxidants, dietary fiber and good quality protein. Pic’s jar and lid is designed to encourage reuse rather than just recycling.
We’re very excited that Pic’s wants to share some amazing recipes with our community. Enjoy!
***
Peanut Butter Surprise Muffins
Tender and sweet peanut butter muffins with a surprise jam center will delight kids and adults alike. Perfect for breakfast, brunch, and snacks.
Ingredients:
1/2 cup Pic’s Creamy Peanut Butter
1/4 cup unsalted butter, at room temperature
1 cup light brown sugar, packed
2 large eggs, lightly beaten
2 teaspoons pure vanilla extract
2 cups all-purpose flour
2 teaspoons baking powder
1/2 teaspoon baking soda
1/2 teaspoon sea salt
1/4 teaspoon ground cinnamon
1 cup milk
1/2 cup thick all-fruit jam or spread
Directions:
1. Preheat oven to 400°F. Prepare two standard muffin tin with 18 paper liners.
2. In a large bowl, beat peanut butter and unsalted butter with an electric mixer until creamy. Add the brown sugar and beat until well combined. Add the eggs and vanilla, and continue beating until light and creamy.
3. In a separate bowl, whisk flour, baking powder, baking soda, sea salt, and ground cinnamon. Add one third of the dry ingredients to the creamed mixture and beat on low speed just until combined. Add half of the milk, and beat again. Add another third of the remaining dry ingredients, followed by the rest of the milk, and ending with the remaining dry ingredients. Continue mixing just until batter comes together. Do not over-mix.
4. Using a small ice cream scoop or spoon, fill the wells of the muffin tins about 1/4 full. Use the tip of a spoon to push the batter to cover the entire bottom and a little up the sides. Place one rounded teaspoon of jam in each of the 18 wells, making sure to keep it in the center as much as possible. Top the jam with the remaining batter, making sure it covers the jam.
5. Bake for 15-20 minutes, or until the tops are golden brown and spring back when gently pressed. Let cool in pan for 10 minutes, then remove and serve.
Yield: 18 muffins
***
Peanut Butter Caramel Popcorn Balls
The irresistible flavor of brown sugar, honey, and peanut butter come together in these delectable, chewy treats.
Ingredients:
18-20 cups popped popcorn*
2 cups dark brown sugar
1 cup heavy cream
1/2 cup unsalted butter
1/2 cup honey
1/2 teaspoon sea salt
1 teaspoon vanilla extract
1/2 cup Pic’s Creamy Peanut Butter
Directions:
1. Have popcorn ready in a very large mixing bowl. Set aside. Place brown sugar, cream, butter, honey, and salt in a heavy-duty 4-quart or larger pan with tight-fitting lid. Stir constantly and bring the mixture to a boil.
2. Lower the heat to medium and cover tightly with the pan lid. Cook for 5 minutes without removing the lid.
3. After the 5 minutes, remove the lid, being careful not to drop any water back into the pot. Clip a candy thermometer to the inside of the pan and cook until soft ball stage (236° to 238° F.) Stir constantly to keep caramel from burning on the bottom of pan.
4. Once caramel reaches the soft ball stage, remove from heat and add the vanilla. It will bubble up and splatter, so be careful! Stir in the peanut butter. If there are any lumps, use a whisk to stir until smooth. Immediately pour the caramel over the popcorn, stirring with a large wooden spoon until all of the popcorn is well-coated.
5. Let cool until still fairly warm, but not hot enough to burn your hands. Grease hands well with butter or a little oil. Scoop up a big handful of popcorn and form into a ball. If using stick, insert in one end and place on parchment paper or a greased pan to finish setting up.
Yield: 16 popcorn balls
*Note: 3-4 bags of microwave popcorn, or 2/3 cup kernels popped equals 18-20 cups of popped popcorn.
***
Thai Chicken Nachos with PB Curry Sauce
Fusion food at its finest! Spicy peanut curry sauce goes splendidly with toasty melted cheese and tortilla chips. Topped with fresh raw veggies, pineapple, and cilantro, these are utterly addictive.
Ingredients:
One bag (10 ounces) tortilla chips
1-2 cups cooked chicken breast, shredded or diced (optional)
2 cups shredded cheese (Mexican blend or Monterey Jack)
3/4 cup shredded red cabbage
1/2 cup shredded carrots
1/2 cup fresh pineapple, diced
5 green onions, white and tender green parts, thinly sliced
2-3 hot chiles, thinly sliced
1/4 cup chopped cilantro
For sauce:
1/2 cup pic’s Creamy or Chunky Peanut Butter
1/4 cup dark brown sugar
1/4 cup coconut milk
1 tablespoon Thai red curry paste, or more to taste
Juice of 1 lime
Directions:
1. Preheat oven to 400°F. Have ready a large, rimmed baking sheet. Whisk together sauce ingredients and set aside.
2. Arrange chips in an even layer on the baking sheet. Sprinkle the chicken evenly over the chips. Drizzle with some of the peanut butter sauce followed by the cheese. Place in oven and bake for 5-10 minutes, or until cheese is completely melted.
3. Sprinkle the shredded cabbage, carrots, pineapple, chiles, green onions, and cilantro over the nachos. Drizzle with more of the peanut sauce. Serve immediately. Pass any extra sauce alongside.
Yield: 4-6 servings
Note: For a meatless meal, leave off the chicken for amazing vegetarian nachos. This recipe makes enough sauce for 2-3 batches of nachos. Store in the fridge for 1-2 weeks.
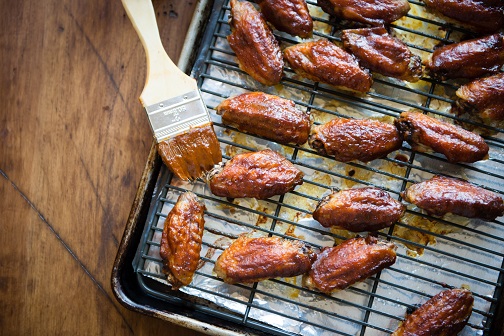
Baked Peanut Butter BBQ Wings
Peanut butter adds a little something special to this sweet and spicy BBQ sauce. Serve these up for game day, the holidays, or anytime a craving for hot wings hits.
Ingredients:
For wings:
2 tablespoons oil
Sea salt
5 pounds chicken wings
For BBQ sauce:
One 15-ounce can tomato sauce
3/4 cup brown sugar, packed
1/2 cup Pic’s Really Good Peanut Butter, creamy
1/4 cup molasses
1/4 cup apple cider vinegar
2 tablespoons chili powder
1 teaspoon ground cumin
1 teaspoon sea salt
1/2 teaspoon garlic powder
1/4 teaspoon ground cayenne
Directions:
1. Preheat oven to 400°F. Line two rimmed baking sheets with aluminum foil or parchment paper. Set a baking rack over each pan.
2. Toss the wings with the oil and season well with sea salt. Arrange in single layers on the racks. Place in the oven for 45-50 minutes. Switch the baking sheets, top to bottom, halfway through cooking time for even cooking.
3. While wings are baking, prepare sauce. In a medium sauce pan, whisk all of the ingredients together. Bring to a simmer and cook for 10-15 minutes. The sauce will thicken up. If it gets too thick, whisk in a little water. Keep warm.
4. Remove wings from oven. Use about 1 cup of the BBQ sauce and brush evenly over the wings. Place back in oven and continue baking for 10-12 minutes.
5. Let cool slightly before serving. Serve wings with the remaining sauce.
Yield: 8-10 servings
***
Peanut Butter Pave (Brazilian-Style Layered Dessert)
Traditional Brazilian Pave is a simple trifle-like layered dessert. This version uses mascarpone cheese and peanut butter to create the rich, creamy mousse layered between milk-softened lady fingers. It’s the perfect no-bake holiday dessert and can be made days in advance. In fact, it only gets better as it sits.
Ingredients:
8 ounces mascarpone
One 14-ounce can sweetened condensed milk
3/4 cup Pic’s Really Good Peanut Butter, creamy or crunchy
1 tablespoon pure vanilla extract
1 cup heavy cream
48 lady finger cookies
1 cup milk
1/2 cup chocolate shavings, optional
Directions:
1. Have ready an 8- by 11-inch baking dish.
2. In a large mixing bowl, beat mascarpone with an electric mixer. Add the condensed milk and beat until combined. Add the peanut butter and vanilla extract; beat again. Set aside.
3. In a separate mixing bowl with clean beaters, beat heavy cream until soft peaks form. Gently fold into the peanut butter mixture. Set aside.
4. Place the milk in a wide shallow bowl or salad plate. Dip 12-15 of the lady finger cookies into the milk and lay evenly across the bottom of the baking dish. Break them into smaller pieces as needed so they fit into all the corners and spaces. There will be some gaps between the cookies.
5. Spread one third of the peanut butter mousse over the cookies. If desired, sprinkle with some of the chocolate shavings. Dip 12-15 more lady finger cookies into the milk and create another layer over the mousse. Top with the next third of the mousse, making sure to spread it evenly to the edges. Sprinkle again with chocolate, if using.
6. Repeat the layering with the remaining lady fingers and mousse. Top with more chocolate shavings, if desired. Cover and place in fridge for at least 3-4 hours, or preferably overnight. The cookies will continue to absorb liquid and become soft, and the mousse will set up.
7. To serve, cut the pave into 12-16 pieces. Best served chilled.
Note: This can be made 3-4 days in advance. It gets better as it sits. Will keep for about a week in the fridge.
Yield: 12-16 servings
Follow Pic’s Really Good Peanut Butter:
Facebook : picspeanutbutter
Twitter: @pics_pb
Instagram: @picspeanutbutter
Pinterest: picsrgpb
Like what you read? Sign up for our free newsletter so you can be informed of the latest FREE webinars & teleclasses, parenting articles, & weekly raffles.
The views and opinions expressed on this blog are purely the blog contributor’s. Any product claim, statistic, quote or other representation about a product or service should be verified with the manufacturer or provider. Writers may have conflicts of interest, and their opinions are their own.

